About Me
Followers
Nikonstudio.tumblr.com Posts
Saturday, January 31, 2009
Tip - Turn Off VR on Nikon D90 Kit Lens when Tripod Mounted
Extensive test everywhere has shown one interesting tip we should pay attention to - turn off the VR mode on your 18-105mm kit lens when mounted on a tripod. This will result in significantly sharper images! The above image is obtained with VR activated when mounted on a tripod. The image below is one where VR is deactivated while shooting from a tripod.
In fact, upon scrutinizing the user manual of the lens, it indeed says to NOT use VR on a tripod. So there you are ladies and gentlemen! The handwriting's on the wall. Turn VR off when shooting from a tripod for sharper images.
Nikon D90 Sensor Cleaning Tools
Say a visit to the Nikon Service Center is too troublesome for you and you want a bit of DIY satisfaction with the maintenance of the Nikon D90. No lint-free cloth will do the job when it comes to cleaning the fragile sensor grid.
It's an occasion to utilize the "arctic butterfly" toolkit. So with some spare cash to spare, this magnificent tool features a bright LED that illuminates the sensor while in operation. This illumination reduces the possibility of fibers being dragged accidentally against the surrounding cavity hence reducing the potential cause of smear usually caused by contaminated fibers.
Get yours [here] for $90.
Friday, January 30, 2009
Solving the Problem of Smallish Viewfinder of Nikon D90
Sometimes, you swear what you composed was razor focused, only to find that its not in Aperture 2 or Nikon ViewNX. Blame it on the small viewfinder or get a new pair of specs after an eye check. Or forget about using the default viewfinder piece - Nikon DK-23 rubber eye cup, while replacing it with the Nikon DK-21M.
It promises a magnification of your viewfinder by over 17%, giving you greater confidence of knowing what you are aiming is what the camera is aiming.
Note to adjust your diopter dial to make effective use of the upgrade. Retails for $24.95.
Redundancy of Nikon DK-5 on Nikon D90
Rummaging through the Nikon D90 retail box, I came across an accessory item Nikon DK-5 which I found rather cumbersome to use when shooting people portraits. Its a piece of plastic that attempts to shield the viewfinder from glare when on timer mode shoot.
Much later, I found a neat trick to do what the Nikon DK-5 does, only totally not requiring the tedious chore of putting it on and taking it off! Just simply activate the Live View Mode when shooting with a tripod! A shutter curtain within the Nikon D90 will automatically be activated, cutting any remaining glare that sip through the glass view finder. This way, you still achieve the goal of not letting stray light confuse your exposure setting.
There's bound to be something new each day!
New Addition in the Family - Second Nikon EN-EL3e for MB-D80
With an extended battery life much needed for anyone who wish to shoot images and videos in places power points are few between, you need another Nikon EN-EL3e battery in your MB-D80 battery grip.
Latest figure from Nikon claims the battery will last an average of 850 shots per charge, although using it to record video consumes far more power. Conservatively, unless you are video recording 5-minutes clip every 6, the two Nikon batteries are estimated to churn out approximately 2.5 hours of recordings (overheating may occur), plus about 500 still shots.
Now, if you are planning to do most still shots like me, medium-duration road trips lasting 7-10 days (with average daily shots of 150) can be performed without bringing the charging adapter supplied with the Nikon D90 along.
Notes to Shoot Aperture Priority Mode with 50mm F/1.8
Here's some new findings for all you 50mm F/1.8 owners. Despite the fact that we are told to lock the lens up to the minimal aperture of F/22 for only "P" or "S" mode, we should leave it locked even in "A" mode to avoid the "FEE" error appearing on the Nikon D90.
Secondly, the use of DOF Preview button found on the Nikon D90 body will now become vital in helping us preview how well exposed the final shot will appear literally. As you will notice, shutter speed begin to drop with us moving the aperture closer to F/22.
You tweak the aperture size using the Nikon D90's sub command dial (the one in front of the camera by default). Narrowing down the depth of field (with bigger aperture size) will give bokeh (a photographic term referring to the appearance of out-of-focus areas in an image produced by a camera lens using a shallow depth of field) effects on both the foreground and background of the subject.
There! We have taken our first step into the realm of Aperture Priority shooting.
Favorite Shooting Mode Revealed
Not surprisingly, the limitation of shooting exclusively with the "P" mode should now become pretty clear. At times, it just doesn't cut the mustard. At a review on the more popular shooting mode, it is true that Aperture Priority receives the greatest appeal.
In fact, only 16% of the crowd prefer Program Auto mode! To fully understand the appeal of the "A" mode or "S" mode, it is recommended you shoot exclusively on that mode for say a month. No amount of written guide can give you that feel you require.
Nikon D90 Live View for Video Recording
I did mentioned in the past, some of the key advantages of using live view for image shoots. Nevertheless, as our focus now delve on video shooting, let me touch on some of the basic highlights on using it properly.
Focus is manual in live view video mode, in hope by Nikon that special video effects be possibly achieved at the cost of lazy users like us! But I am pleasantly surprised that sound recording (only mono channel recording) can be muted entirely (Shooting Menu -> Movie Settings). This gives us the ease of adding our music into the video composition thereafter. 720p HD video recording is limited to 5 minutes whereas a lower recording resolution will yields longer clips duration.
Interestingly, the White Balance can also be dynamically adjusted on the fly while recording your video on the Nikon D90! I am also quite impressed that the camera automatically adjust to the lowest ISO for your video shoot, depending on how fast a type of lens you have attached to your camera. Neat! Hence, the rule of thumb is, video quality significantly improves with a faster lens (ie bigger aperture). Note that for lens with aperture ring, it should be unlocked to allow manual adjustment for a proper video set.
Trick to try is this, if you are lazy about playing with your aperture during your video shoot, set it to the highest value for your lens and leave it as that, promising the deepest depth of field for sharper videos.
Nikon D90 Body Maintenance - Mirror Section
No matter how well you store your Nikon D90 or practice the invert-change-lens rule, or for that matter, don't change lens at all, you are bound to have dust settled in the mirror section and sensor section of the camera.
I was doing a routine inspection by simply looking through the lens towards a light source and voila! Dust speckles are deposited everywhere on the mirror section! There's even smudges on the lower section of the mirror. Now, I have not activated the "Lock mirror up for cleaning" function in the Setup Menu, but I decide to give the sensor the benefit of a doubt that it is still clean. Besides, sensor cleaning should be done by the local Nikon technicians if you clearly lack a steady hands and right tools.
With a lint-free dry cloth (usually come standard with purchase of a good LCD monitor or laptop), I gently removed the lens and began cleaning the smudges and dust particles off the mirror section. Shortly after, the job is done. Talking about sensor cleaning, its a good practice to enable it when you off/on the camera. This way, you leave no occasion to chance that dust deposits starts accumulating on the sensor grid.
Note, for zoom lens, air is drawn into the lens when you zoom in and out, giving occasion for dust to get into your body with the lens tightly attached!
Wednesday, January 28, 2009
Bottomline - Sharpness of Nikkor 50mm F/1.8 Via Manual Focus
Another week, another chapter to fine tune my experience with the Nikkor 50mm lens. I have been absent for a few days due to work commitment but I am back to share my new findings with the 50mm lens I own.
To really appreciate and achieve sharp images out of this lens, I strongly concluded that manual focus is the only way to go! No means of narrowing down single-point focus etc. will yield consistently sharp focus. Only the gauge from your eyes can determine that via manual control of the aperture ring. But again, if this is not possible, attempt to shoot at F/2.8 to F/5.6 for sharp auto-focused images.
Otherwise, its goin' to turn soft and fluffy 95% of the time, giving you that reason to avoid its use subsequently.
New Year Photography Resolution - Join A Few Photography Contests!
Hey, that's what I said! Unlike folks who upload their photos onto Flickr, Picasa etc. and leave it as that with a bunch of comments, I thought I can make this a bit more interesting in 2009. Nikon should have one sometime in September 2009 but that should not stop you from joining any local contests before that!
Go on, get yourself together and inject a few doses of life enrichment in the current economic slump. Most folks I talked to has given up on doing their company sales forecasting. Its pointless they say. Its just survival of the fittest for the next few years. So, why not join in that next photo contest in your city? Your boss has or will probably request you to take FTO soon. A Leave Of Absence (LOA) is however, not necessary.
Tuesday, January 27, 2009
Limitation of P Mode and Auto WB in Nikon D90
As I clocked more scenario and time in my shoot out, I am beginning to see why the A and the S mode is, to most professional, a better way to operate their camera on. Frankly, I was getting quite comfortable in my "P" education level. In fact, 98% of the shots in my gallery was taken in the lazy man "P" mode.
I kinda dreamt about this moment in writing the need to graduate from the automatic mode of photography some days back. Using the F/1.8 aperture of the Nikkor 50mm has indeed taught me that not always, bigger is better. The very shallow DOF just messed up quite a few of my shots recently. Also, in my eagerness, I may have also broken the law of the closest focal length of the lens.
The Auto White Balance also turn screwy as color rendering began to look confused when in focus of strong-colored subjects and ambient! So, I guess that's why there is indeed more to learn and write about in photography after all! Check the above image as an example of color overrun in one of my shoot.
Interesting Observation of Nikon D90 Shutter Speed
Being the time of the year where family portraits is the preferred shooting mode, I have been shooting for the last two days with my tripod. However, when mounted on the tripod (in P mode), the Nikon D90 does occasionally take the liberty of releasing my shutter at a slightly lower (set at minimal 1/50 in my menu) speed of 1/40 second! Hmm...how interesting!
O yes, this will happen when the "Lo" indicator is displayed in your viewfinder. Rationale? In Program mode, if you do not pop the built-in flash up, the camera will first attempt to raise the ISO. Secondly, it will also attempt to shoot at the largest aperture possible from the lens. Third, if what's done is still insufficient, it will attempt to lower the shutter speed to the predefined lowest. It should not go any lower as I experienced above. I think it can be said that this could possibly be the first discovered "bug" in the firmware?
Nikon D90 still allows a shutter release despite the "Lo" setting but should not "override" the predetermined lowest shutter speed in the Shooting Menu.
Sunday, January 25, 2009
My Current Favorite Combination of Nikon D90
Attempting to perfect the use of the 50mm lens, I now carry with me the following setup to shoot everywhere I go...including tonight's Chinese New Year Eve reunion dinner.
The large F/1.8 aperture literally makes flashes almost redundant during low ambient lighting. My MB-D80 battery grip simply allows me to shoot longer without concern about low battery, in both video and image mode all day.
100th Posts - And We Are Just Warming Up!
HDR Revisit Finally! - Photomatix Pro
The fundamental ground for good High Dynamic Range (HDR) images consists of a combination of appropriate software - Aperture/Photomatix Pro, stable tripod (or forego tripod use by shooting brackets at 4.5 FPS - see my previous posts), "ideal" composition, "good" weather condition and auto-bracketed Nikon D90.
With my recent installation of Photomaxtix Pro on my Macbook Pro, its finally time to begin. Get the full copy of Photomatix Pro for only $99! If you are like me, a novice in HDR, head towards [here] for a debrief before embarking on your first HDR shootout!
The above image will soon look quite familiar to you...
Introduction to Nikon D90 D-Movie Mode
UV Lens Filter Problem At Night
Most of us will invest in a lens filter to protect our optical investment. But do note that undesirable lens flaring (see image above) can occur when having it on during night shoots.
My experience has got me to have no choice but to remove it entirely during the shooting duration. This very much applies to situation where strong fluorescence light sources are in the vicinity of the shoot.
Otherwise, it should be fine.
Inserting Copyright Information on Image Taken on Nikon D90
Ever wonder if this can be done and how it be applied to each image you take?
Simply fire up your menu, and move to the Setup Menu tab. Select "Image Comment" and "Input comment". Upon entering your copyright information, hit "OK" before checking the "Attach comment" menu item.
Done!
Sadly, unlike the Nikon D3, no voice note can be attached to the photo you take on your Nikon D90. On first glance, these EXIF information can only be visible when third-party programs like Aperture 2.1, Photoshop CS3 or Nikon View NX are used.
Saturday, January 24, 2009
Battery Choices - Third Party Versus Nikon's
In a word, its just not worth it! Most buyers who bought into generic battery pack got their rude wake-up call when it refuses to charge while some only worked on a specific model of a camera. Yes, it may look and give buyer a kick into thinking they saved, but only a fraction of my friends who did so was rewarded.
Moreover, its a $1400 machine...why risk saving $20 on a generic battery? Nevertheless, the better known OEM battery manufacturer include Camera Devices and Adorama.
Nikon Technology - Creativity Without Compromise
What exactly makes Nikon ticks? Its the underlying edge in encasing the most advanced photography technology under each of her camera.
Here's a summary of what makes Nikon owners proud of owning their camera
- Nikon Lens - Super Integrated Coating and Nano Crystal Coat / Super ED Glass / Vibration Reduction / Aspherical Lens / silent Wave Motor
- 3D-RGB Matrix Metering II - Active comparison with built-in 30,000 image databank in camera
- Legendary Creative Lighting System - iTTL / Auto FP etc.
- Advanced Multi-cam AF Sensor Module - up to 51 AF Points
- Rock-Solid Reliability and weight ratio
- Superior Design Ergonomics
- Wireless Flash Commander Built-in
Videography with Nikon D90
Well, for coming to over 100 posts in 1.5 months, we have been quite obsessed with the photographic aspect of the Nikon D90 camera, and we have not until now even attempt to look at the video capturing capability of the camera!
Oversight? No, of course not! There's seriously just too many things to approach this camera!
Now that we got an amateurish concept of using the Nikon D90 image capability, we can begin to cover the videography aspect of the camera and pitch it against video quality, ease of use of dedicated video camcorders from Sanyo, Sony etc.
Stay tune!
Friday, January 23, 2009
Happy Lunar New Year!
Focus - Portraiture Photography Approach
Intent/Purpose
- Most deliberate portraits are shot either to flatter the sitter or to express individual character
- Shoot with the intent to sum up the person as a character
- Helpful to know how a picture is to be used
- It definitely helps to be extrovert and good with people
- A broad face or broad shoulders look narrower from a three quarter viewpoint instead of square-on
- Photographed from a low angle someone will look dominant, whereas shown from a high viewpoint they can appear dominated
- Avoid trapping people into straight-jacketed poses and critical lighting arrangements which are bound to make them look artificial and ill at ease
- Organize everything for a natural and productive relationship between you and your subjects
- It is a good idea to use a tripod anyway
- For half-length or head shots, pick a slightly longer than normal focal length lens (i.e. 150mm for 6x6cm or 85mm for 35mm)
- Work from a more distant viewpoint, giving a less steep, more flattering perspective and intimidating the sitter less with your camera equipment
- Daylight indoors light source often gives excellent natural qualities but it can be difficult to control
- Try to go for a simple lighting arrangement that allows subjects to change posture easily
- As soon as possible, stop tinkering with the equipment and concentrate on your relationship with the sitter
- Use a combination of reflectors, diffusers and Speedlight to achieve ideal indoor lighting. This applies to outdoor shoot as well
Thursday, January 22, 2009
To Tripod with Manfrotto 190XB
Its the good old contention of many photographers - to tripod or not to tripod. So far, in my attempt to justify a tripod, I have stated a few scenario that you must have a tripod
- Infrared photography
- Videography with Nikon D90
- Closed-up macro photography
- Sports/Wildlife photography with a cheap telephoto lens (e.g. Nikkor 70-300mm f/4-5.6G)
- Night scenes with low ambient light
- HDR photography
- Special effect photography (e.g. slow shutter speed deliberate long exposure shots)
The majority of photographers including myself, are familiar with the tripods made by Manfrotto and there is one particular entry-level tripod I would strongly recommend to hold anything up to 6kg - 190XB Tripod. The ball head I bought to go with that is the Manfrotto 486RC2 compact ball head. Its 1.8kg weight can be considered "portable" while its ability to be set to few inches off the ground is commendable. Other advantages include invert mount and shoot, gearless center shaft (quick release), quick-release legs and superb 3-year warranty (online registration required).
This combi will set you back about $200. But trust me, its goes neatly with our Nikon D90.
Wednesday, January 21, 2009
Word of Caution About Handling Nikkor G Lens
I know our Nikon D90 is not exactly light and fluffy, not to mention it with an attached lens.
But I kinda realized that all Nikkor G Lens are built with plastic mount (true with our 18-105mm kit lens), not metal ones! So what, you might say.
Err...this will and should change the way we hold our camera with immediate effect. I am sure we are, at times, quite comfortable holding our camera on the lens barrel section. Now, the weight exertion of the body on that plastic lens mount may well be the cause of the infamous F-- error? Could this be it?
Its a logical deduction as I do occasionally hold it in the above manner due to the longer barrel length of the kit lens.
Your guess is as good as mine...
Chill Out! Bring Back Some Form!
Hey, reading my blog and attempting to digest everything in a day or two is hard work!
Forget about the technicalities of photography for a few days and pick up your camera (with your favorite lens) and head out with your family for dinner somewhere. Or bring the kids to a nearby national park. Enjoy your life and bring back some form in shooting later.
I tend to do that periodically as we ought not to revolve our lives around our camera!
So, chill out, regroup and spend a while to naturally integrate photography into your daily life (I am beginning to carry my camera in a duo-purpose Targus (R)evolution backpack daily together with my Macbook Pro).
Cost-Effective Tripod Recommendation - NG TT1 Tundra
We have been here before, talking about the need for a decent tripod. Monopod's war is over - it's Trektech's Trekpod! But what if you need a tripod? A decent one without closing your bank account?
I recommend the National Geographic NGTT1 Tundra tripod with an integrated ball head.
Key Features
- Dial at the top of the legs allows for angle adjustments. Turn the dial to select normal leg angles (23 degrees), medium leg angles (45 degrees), or low-angle (80 degrees) to achieve ground level shots.
- The column unscrews and splits into two sections. In combination with the low angle leg setting you can get your camera all the way to the ground.
- Natural anti-rotation shape ensures the legs don't turn. The elliptical shape also provides greater rigidity at the point where the legs attach to the tripod.
- Easy-to-grab knob quickly locks and unlocks the head.
- Large rubber feet provide stability on flat and uneven surfaces.
Priced at about $75
But do note that this tripod is unable to take a combined lens-body weight of over 2kg!Nikkor Weather-sealed Lenses Identified
Infrared Photography with Nikon D90
Yes, you can! Now, if you have been wanting to know if the sensor of the Nikon D90 is any good in the IR realm, I can summarize with a short "kinda". It does take significantly longer in exposing your shots in each scene but it should yield what you are looking for with a nice Hoya R67 IR (assuming the Nikon D90 kit lens is used) filter over your lens.
In this case, a tripod is mandatory. No amount of VR technology is going to help you shoot IR images handheld. Point to note - always turn to Monochrome mode, manual focus. WB should be set to custom in K values. Shoot in sunny well-lit days for ideal result.
Read about this more [here]
Have fun!
Tuesday, January 20, 2009
2009 Trip #2 - City of Manila Philippines for Photo Shoot
I admit it. Its primarily because of work I am heading there next month in Feb 2009. But hey, what's stopping me from adding a few days into the agenda for a photo shoot?
Suddenly, there is so much more things to think about now...in locating the right place to shoot in Manila. Ya, work work work. No play makes Jack a dull boy!
Hmm...all that cables (see above image) makes me wonder what I will be surprised next in that big city.
Focus - Sports & Action Photography Approach
Here's hopefully what I call the "meat" of the blog - the real deal where we get some expert opinion of shooting some scenes we are enthusiastic about. Its a summary of what I read from 50 magazines, books about digital photography, packed into some layman terms for easy digestion!
Enjoy!
Intent/Purpose
Enjoy!
Intent/Purpose
- Fun and self-fulfillment
- Sale of image to newspaper, sporting press, magazines for some cash
- Fully understand the sports or activity you are covering
- Ability to anticipate a high point in the action and to immediately respond to some vital moment
- Aim is to capture participants’ skill, anguish and tension, plus the dramatic excitement and atmosphere, preferably all summed up in one shot
- Go for the expressions and body language which visually communicate how it feels to be taking part
- Ensure big memory card storage available
- Will shoot mostly in burst mode (i.e. 4.5 FPS)
- Wide-angle lenses are useful for crowd shots, general scenes and dramatic, steep perspective close-ups
- Wide-aperture high focal distant lens (e.g. 300mm) for certain games like cricket is mandatory
- Work at shutter speeds of 1/500 and upwards
- Tripod or monopod almost standard requirement
- Flash may be prohibited so only high ISO can help you in low light conditions
- Prefocus on some key spot on the ground and shoot when the action reaches this point
Technical Highlight - Nikon D90 CMOS Sensor
Here's something more technical for a change! The Nikon D90 CMOS sensors employs a technology in which both the photodiode and a readout amplifier are incorporated into a pixel. The technology is known as ‘active pixel sensor’ (APS).
Unlike the CCD, the charge accumulated at each photosite in a CMOS sensor is converted into an analogue voltage in each pixel and the voltage from each pixel is connected to a common readout line using switching transistors in each pixel. The photodiode and associated amplification circuitry are arranged on an x–y grid.
A comparison table is provided above to compare CCD and CMOS sensor technologies.
Nikkor Lens Picture Gallery
Nikon does have a fairly huge array of lens kit and it does help if we can get an idea of how each one turns out in the hands of some users. With the current Nikon D90 kit lens (18-105mm VR) and 50mm F/1.8D in my inventory, I am contemplating a third and final lens for the Nikon D90. I mean, to give me a decent latitude while shooting.
Some friends of mine suggested a 70-300mm VR II glass (a tripod will almost be mandatory) to shoot wildlife and sports but its also equally tempting to delve on macro photography with a 60mm F/2.8.
Well, I am currently looking into it [here]. Perhaps, it may help you decide too.
Weather-proof Worthiness of Nikon D90
Has anyone put his Nikon D90 to a grueling weather test so far and survived? Like Nikon service warranty, its always not clearly stated as to how much can the camera take before crumbling into malfunctions.
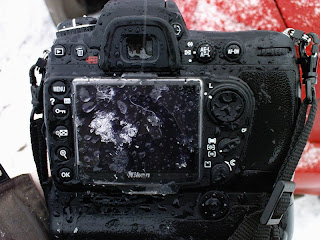
The bigger sibling Nikon D300 (see image above) has withstand hell but a more preventive approach should be adopted for the Nikon D90. [Fotosharp] recommends a "rain coat" and it looks interesting. While some others simply recommend a conventional zip-lock bag packed with silicon!
Well, I guess as long as its operating within the 0-40 Degree Celsius / 85% humidity boundary, you should be fine. Here's the [comment] from some users about their Nikon D90.
Basic Tips - Always remove your battery from the camera during cold transport and keep it close to your body (warm).
Monday, January 19, 2009
Nikon SB-400 Killer?
I'll be darned! This is the problem you face when you research a bit more persistently. A better product that threaten the very meaning of conventional products. For those of you who is ready to splurge on the Nikon SB-400, hold your horses!
Introducing a strong alternative to the Nikon SB-400 - Professor Kobre's Lightscoop. And boy is it favorably priced at $34.95!
Check it out [here].
War-proofing the Nikon D90?
Ever thought of going into an extremely harsh environment with your Nikon D90? Or are you so paranoid that its a war campaign whenever you bring your camera out for a holiday?
Fear not - help is at hand! Encase your precious camera with the world's first armor shield and brave that next trip confidently.
Looks like a tank to me but I have doubt it will fit the Nikon D90...[this] is meant for the Nikon D80. BTW, Made Product recently got acquired by Lowe Pro. We'll see...
Nikon School of Creative Lighting
In my quest to improve my use of Nikon SB-400, I got hold of this extremely useful videos made by Nikon - Hands-on Guide to Creative Lighting.
It consists of two video segment, each lasting about one hour. In it, you get to learn how the world-renowned photographer - Joe Mcnally shoot with his Nikon CLS suite to achieve stunning imagery in the face of challenging scenes like the fishing wharfs, bridal day, habor portraits, dance studios etc.
A must have for those who wishes to improve a better use of their Nikon Speedlight. Well I did!
Its indeed an eye-opening experience.
Buy it [here]
Nikon 7072 Cleaning Kit Pen
Hmm...a neat cleaning kit I picked up today. It sure beat the current cleaning kit I am given with the Nikon D90.
Technical Details:
- A simple lens-cleaning system
- Soft brush retracts into pen body to stay clean
- Small, pen-style design easily fits in any camera bag
- Removes fingerprints, dust, and other debris that may compromise your image
- Works with all types of cameras (digital and film), as well as binoculars, telescopes, and other optical products
Double Dare - Extend your Strobe Cord SC-28 DIY Style
Now, if you are unsatisfied with the 9 feet reach of the Nikon SC-28 (While using your Nikon SB-400), you are in luck.
Some dare devils actually managed to extend that reach to as long as your LAN CAT5 cable can go!
Now, this is not for the faint-hearted. Start your adventure [here]
You have been warned that this one-way-street exercise totally void your Nikon product warranty...Obviously.
Sunday, January 18, 2009
Underwater Photography with Nikon D90...Anyone?
Overview
- Controls for all camera functions are provided with the exception of focus selector lock and diopter adjustment control.
- AE/AF lock can be activated with your thumb while holding the housing's handle.
- All camera modes including D-Movie and Live View can be accessed through the housing. The camera's media card and battery can be removed and replaced without removing the camera from the housing tray.
- The proven reliable Ikelite bulkhead allows for fail-safe connection of external strobes. Right-angle positioning relieves stress on the sync cord even when the housing is laid on its back.
- The housing includes iTTL conversion circuitry that puts perfect exposure at your fingertips. The TTL mode provides four 1/3 f/stop increments over or under flash compensation that is added to or subtracted from any compensation entered into the camera. Seven manual power settings in half-stop increments allow for complete creative control. All choices are obtained by simply rotating a knob on the housing back.
- The special TTL conversion circuitry operates perfectly with current model Ikelite DS digital SubStrobes. See Update Requirements for strobes produced before Sept. '04.
- Non-Ikelite strobes can be used, but they can not provide TTL or be manually controlled through the housing back.
- Lens port not included.
Perfecting the Use of Nikon SB-400 Speedlight
Ever since my purchase and use of the Nikon SB-400 Speedlight, I keep getting the impression its being under-utilized. Well, the bounced effect was always great, with my subject not burnt with white light due to Nikon's legendary CLS engine in the Nikon D90 but I think I am still missing something here.
My recent desire to step up to the Nikon SB-600 has been subverted by a couple of professionals I came to know; and laying on the line for approximately another $250 for the SB-600 is not exactly my idea of prudent spending in a bearish economic scene like now.
So, I am reverting my ways to take a second look at "squeezing" every drop from my Nikon SB-400 before moving forward. And perhaps, my research can yield added techniques to improve our flash photography skills (without being outlandish in getting new equipment after new equipment!).
You see, top-mounted flash photography (with vertical bounce feature) is level 1. Enhancing the Nikon SB-400 with color gels (to offset "bad" light spectrum) or diffuser (e.g. from Sto-fen) is level 2. But getting a Nikon SC-28 extension cord for off-camera TTL flash photography with the SB-400 is what I consider level 3.
The above image is taken with the Nikon SB-400 at level 3. The effect can be startling! And even if you deicide to shoot with the Nikon SB-400 at level 3 with an independent flash stand, the SC-28 can reach a total stretched distance of about 1.5 meters between the camera and the flash point! There you go! Who needs that Nikon SB-600 after all?
Technical Details of Nikon SB-400:
- Compact, lightweight Speedlight unit
- Operates on two AA-size (1.5V) batteries; fast 2.5 second recycling time
- 18mm angle of coverage with Nikon DX format digital SLR cameras
- Bounce capabilities in 4 steps up to 90 degrees; flash shooting distance range from 2 and up to 66 feet
- Approximate guide number of 98.4 feet at ISO 200 (at 18mm zoom head setting)
O yes, the Nikon SC-28 costs around $45.
Saturday, January 17, 2009
HDR Prerequisite - Tripod Required or Shoot at MAX 4.5FPS
Apart from Auto WB bracketing feature (which replicates total of 3 shots when shutter button released once), photographer literally need to take 3 (or more - see below) continuously shots of the same subject for HDR post processing with the Nikon D90. Note to shoot RAW please.
Hence, a tripod is highly recommended. If you want to cut corners or when tripod is not available, you are advised to shoot at the maximum frame rate offered by the Nikon D90 - 4.5 FPS. Once image is composed, press the shutter to salvo the scene at max rate to reduce shakes.
A new discovery - the overlay tool in Nikon D90 cannot clearly optimize the overlaid images, hence you need Photoshop, Photomatix or something similar.
Some believe a total of 16 shots are to be taken on a particular scene while some chanced it at 2 to achieve optimal HDR images. I am doing 3. (As I am not very motivated to do 16)
Recommended HDR (High Dynamic Range) Subjects
Sure, HDR is not suitable for every and any subjects. Its usually most suitable for capturing the following scenes
- Landscapes
- Architecture
- Portrait/Still Life
- Interiors
HDR (High Dynamic Range) Photography Explained
In short, its a radically new approach to take high contrasty shots, in hope of assisting photographers like us take home with us, a memorable taste of the scene we captured.
The basic layman idea is to take several images of the same subject at different exposures via AEB (Available in the Nikon D90) before merging them together via overlaying techniques found in our camera. The results are often striking, yet this technique may require a good dose of patience and practice. But hey, the advantage in this case is that the Camera has done most of the work for you!)
Again, non-Nikon D90 owners may accuse us of not playing fair in mastering this technique as the image overlay tool is built-in in our camera.
In the next few articles, allow me to take you through achieving this!
Official Nikon D90 Service Interval
Here it is...directly from Nikon's(I mean horses) mouth! If you are a casual photographer who shoots less than 10,000 shots a year, simply bring your Nikon D90 in for an inspection annually. Always request Nikon Service Center to clean your body mirror, remove all accumulated dust inside the body with their special air blower machine and recalibrate your kit lens (together with any other lens you may own of Nikon's).
Specific parts that are subjected to attentive cleaning include the viewfinder, lens mount assembly, mirror, SD card slot compartment and even contact points of buttons within the body. Remember, our Nikon D90 is not weather-sealed!
For the uninitiated who buys their Nikon D90 without a proper electric dry cabinet, please also ask them to check for possible fungus growth and help eradicate them. They may or may not charge for this. I know Nikon charges for doing that for lens that are known to be fungus attacked.
Now, if you are shooting at over 20,000 shots per year, you may want to do the above every 6 months! After a holiday or extensive shootout, you may want to do a little self maintenance with cotton buds and lint-free cleaning cloth. Most importantly, drop your camera back into the electric dry cabinet to dehumidify the entire system first. My experience on this is that humidity index takes over a day to drop back to the optimal level (preset in my cabinet) whenever I drop my camera in after prolonged exposure to outdoor! That means its very "wet".
In a way, treat your camera like your family sedan...
Thursday, January 15, 2009
Solution to F-- Error in Nikon D90
Being the first-time owner of a decent DSLR, you may have or intend to only use the provided kit lens for all your shoot as long as its possible. And perhaps, you have heard or are led to believe that interchanging lens frequently will only adulterate the cleanliness of the sensor.
But you may (like me) also encounter more of the dreaded "F--" error on the control panel when you switch the Nikon D90 on. Reason? The CPU contact points are just too new and are not properly seated in contact with your CPU contact points on your kit lens.
Solution - Do manually unlock and lock your kit lens (without the need to remove the lens from the body entirely) into position occasionally before each shoot. You only need to do this for a brief month or so as the sensor points gets seasoned and responsive with a lens itself.
Cleaning the sensor points with a lint-free cloth on both the body and lens is also advisable.
Wednesday, January 14, 2009
Killer Accessories for Nikon D90
Like a computer, its always good news to owner of Nikon D90 that it can be enhanced with a string of killer accessories (excludes optical lens). Here's a roundup of the dream accessories I would want if the banker is in town
- Eye-Fi Wireless SD Card (2GB) - With this in your SD slot, you've got yourself the ability to shoot, store and transmit your photos or videos wirelessly onto a PC or even to a web host like Flickr! No wires, no mess, no compromise. Price starts from $59.95
- Nikon SB-900 Speedlight - Cream of the crop in flash photography with your Nikon D90, all cutting-edge flash features like image area selection, multiple illumination pattern, auto fp sync roll into a 415g package. Price as low as $399.00
- Hoya Pro1 Digital Filter - The brick and mortar of enhanced color contrasts, and a host of different effects for UV, polarized, ND etc. Price begins at $49.90
- Blackrapid RS-4 Sling - Want to shoot fast but stay non-intrusive? Sling this baby on the Nikon D90 and you are on your way to capturing your candid moments on demand! Cheap but effective. Highly recommended at $49.90
- Trek Tech Trekpod XL - The big brother of Trekpod II (mentioned on my previous article). This lightweight carbon fiber pole stands on its own in a 0.5kg combi and double up as a trekking pole that supports a hefty 6kg of optical equipment without breaking a sweat. Priced at $399.99. Who needs a tripod?
- National Geographic Global Travel Jacket - A jacket with so many useful compartments that it beats the standard photgrapher vest hands down, and yes, all while keep those nimpy weather at bay from $159.00
- Oakley Minute 2.0 - Fits my small face, I always bring it with me whereever I shoot, that I keep my eyes protected before composing each shot in the glaring sun! Price starts from only $105!
- Nikon GPS Unit GP-1 - O right, very suitable for those who shoots and ask questions later. After all, the geo tag information are automatically embedded into each shot you take. Sort automatically later via locations. Not cheap from $250.00
- Nikon MB-D80 - Its so handy and useful to accommodate my full-day shoot with images and videos. Even enhances the ergonomics of handling in every way! Buy at $150 or regret having a sore hand after prolonged shoot session.
Tuesday, January 13, 2009
Identifying the Type of Photographer You Are
No matter which camera you hold, photographers are generally driven by a passion in one of the following areas
- Travel
- Action
- Nature
- Closeup
- People
As for me, its mostly people and travel areas now. And obviously, time is required to fuel that passion to shoot well.
2009 Trip #1 - International Water Cruise for Photo Shoot
OK. Finally managed to squeeze a cruise break for my next photo shoot! All I can say is its a 42000 ton ship that spans over 700 feet. And its going to be interesting. Its a sort of last minute deal but hey, that's better than nothing! To some, its a floating city that probably promote gluttony, gambling on some international water. Well, my agenda, hopefully, is to capture some of that in still shots, in some tasteful ways.
Its leaving the port on the evening and I hope to catch the sun on the horizon if possible. We shall see.And yes, I am bringing the whole family along for the fun of it.
Life is short. Play hard.
Move Aside, Manfrotto 682B!
I personally don't shoot a lot with a tripod, but there are just time you wish you had one with you that day. I have been also looking around for a less cumbersome way to solve my problem and it seems monopod may just be the way to go about it, especially the self-standing ones.
My local chains of photography stores carries the most popular make, including the Manfrotto 682B and it was a shocker when seen in person. My impression of it being sleek, sturdy and light just didn't materialize! It was like a huge metal pole that you see supporting some sort of building infrastructure. Disappointment. Of course, if your wallet is exploding with green bills, you can opt for the carbon fiber model, which does take the weight off significantly.
Moving forward, my quest to look for a multi-purpose monopod points me to Trek Tech's Trekpod II, which is priced equivalent to the Manfrotto 682B. And boy was I surprised at its weight, dimension and usability! Weight wise, Trekpod II is at 760g versus 1150g for the 682B. Price wise, its at $79 versus $105 for the 682B. Hey, lastly, the Trekpod II allows it to function as a real hiking pole, having the ability to withstand up to 90kg of weight exertion!
I am getting this baby home for my next hiking trip!
Outdoor Flash Photography Explored
As far as outdoor flash photography is concerned, the Auto FP sync found in Nikon Speedlight SB-600 and beyond can give that 'umph' and flair to the overall composure, eliminating remaining shadow that may lurk at corners. I have not gone down that road to get a SB-800/900 yet but let me do a bit more homework on what are REALLY the difference before getting one to improve my pictures.
As Nikon claims, the top-of-the-range SB-900 really makes the world your studio!
Shoot Nikon D90 in Tethered Mode
For a while now, I have been shooting family portraits on site with my families and extended family and its, I realize, so much more assuring when you can make use of your laptop's big screen to size up the result of each shot. Especially so, when amateur is concerned in the shooting!
Hence, with my recent setup of Aperture in my Macbook Pro, it sure comes as a breeze as I becoming accustomed to shoot in tethered mode with my Nikon D90.
Monday, January 12, 2009
Pre-Trip Tip - Gaffer Taping the Nikon D90
I always want to shoot in strange places in the lowest profile possible - with a good dose of Gaffer tapes on the logo, model plate etc. It does bring the photographer's profile down some how and give me better space to shoot my expressions.
Good thing about using such tapes are that it leaves no sticky residue when peeled away ultimately.
Don't leave home without it.
Subscribe to:
Posts (Atom)